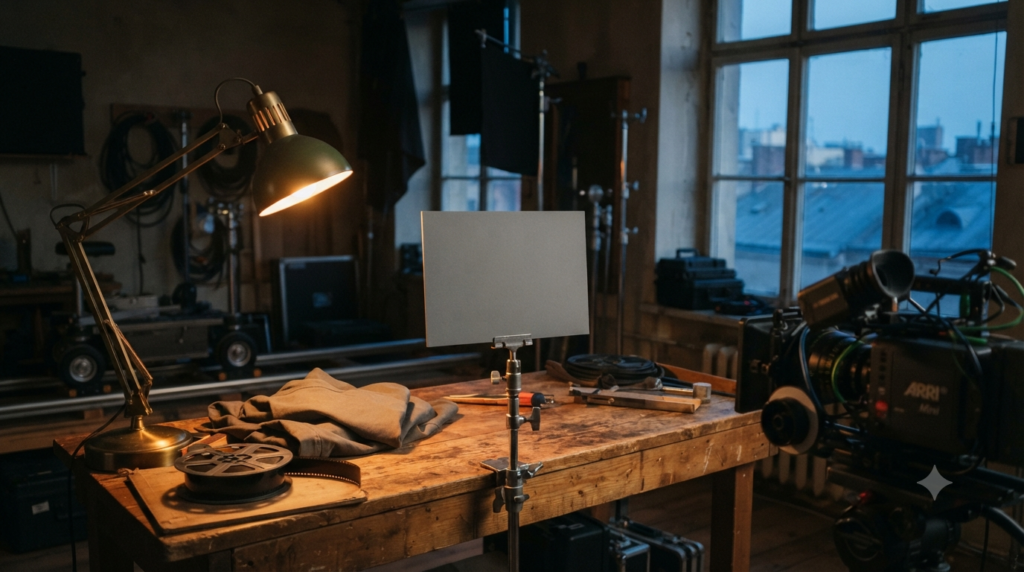
Film White Balance: Colour Temperature and Mixed Light
Film white balance sets how a camera interprets neutral colour under the light falling on a scene. Get it wrong, and a white shirt may look orange, blue or green even when exposure seems fine. The harder case comes when a doorway, ceiling tube and table lamp light the same actor differently.
A useful balance starts with a clear choice: which light should look neutral, and which colours should remain part of the story? A grey card helps answer the first question. It cannot solve every source in a mixed-light room.
Film White Balance at a Glance
- Purpose: Give neutral objects a believable colour under the chosen reference light.
- Kelvin: Set the camera’s blue-to-amber balance for the scene’s light.
- Tint: Fine-tune the green-to-magenta shift that Kelvin alone cannot address.
- Reference: Record a clean neutral grey or white target in the light that matters.
- Mixed light: Choose a priority, control the lamps, or accept purposeful colour contrast.
- Continuity: Keep settings and reference frames consistent across matching shots.
There is no universally correct Kelvin number for a location. Instead, the right choice depends on the sources, subject and intended look. For film white balance, that distinction matters more than memorising a preset.
What Is Film White Balance?
Film white balance is the camera or finishing adjustment that makes a neutral surface appear neutral under a chosen light source. Digital cameras usually express it through colour temperature and tint. In a mixed-light scene, however, a single global adjustment cannot perfectly neutralise several different sources at once.
The sensor records red, green and blue responses rather than recognising a white object as white. Therefore, the camera needs a reference for interpreting the scene’s light. When that reference changes, the same grey fabric can appear to change colour.
Neutral does not always mean attractive. A director may want blue window light and warm lamps because the contrast carries meaning. White balance sets a controlled starting point while preserving room for that choice.
Colour Temperature: What Kelvin Really Tells You
Colour temperature uses kelvin, written K, to describe the warm-to-cool character of light. A lower value usually describes warmer-looking sources, while a higher value describes cooler-looking sources. These labels refer to the light, not to the warmth your camera adds.
Typical reference points include about 3200 K for tungsten studio lighting and about 5600 K for daylight. Kodak uses those values as familiar colour-balance references in its cinematographer’s grey-card guidance. Real bulbs, skies and fixtures can vary, so treat the numbers as starting points.
| Lighting situation | Starting reference | What to check |
|---|---|---|
| Tungsten-style key light | About 3200 K | Does skin look as intended? |
| Daylight-style key light | About 5600 K | Has cloud or shade changed the mix? |
| Daylight plus warm practical | Choose the main subject light | Should the practical stay amber? |
| Different LED or fluorescent sources | Test temperature and tint | Are greens and skin tones shifting? |
One easily missed point: raising the camera Kelvin setting usually makes a fixed scene look warmer. The camera assumes a bluer light and compensates for it. Lowering the setting generally makes that same scene look cooler.
Tint Is Not Another Name for Kelvin
Kelvin mainly handles the blue-to-amber axis. Tint handles a separate green-to-magenta bias. A fluorescent fixture or LED may need tint correction even when its displayed Kelvin value seems suitable.
ARRI’s image-science FAQ describes these as separate camera controls. It also recommends checking a neutral target with RGB waveform or vectorscope tools when eyesight alone feels uncertain. The two adjustments work together, but neither repairs poor light quality by itself.
Reference Cards: What to Put in Front of the Lens
A neutral grey card gives the camera and colourist something known to judge. A white card can work for custom balance too, provided it is truly neutral and not overexposed. Printer paper and painted walls are less dependable because their colour may not be neutral.
Choose a purpose-made reference, keep it clean and angle it to avoid glare. Place it where the main subject stands so it receives comparable light. If the card faces a different source, its reading may be accurate for the card yet wrong for the face.
Grey Card Versus Colour Chart
A neutral grey patch supports white balance and can also serve exposure checks. An 18% grey card has a specific reflectance reference for exposure work, but that value alone does not prove colour neutrality. Choose a card designed for camera reference rather than any object that looks grey.
A colour chart adds several known patches, including skin-like tones and saturated colours. It helps a colourist judge more than the neutral point. Still, neither tool guarantees a perfect match when different lights strike different parts of the subject.
Kodak advises shooting its grey card before a scene and after major lighting changes. The company also distinguishes routine balance references from special lighting meant to stay coloured. That last distinction protects an intentional look from accidental correction.
How to Set Film White Balance on a Digital Camera
The most repeatable film white balance workflow starts before the first take. Pick the light shaping the subject, make a reference frame and lock a deliberate setting. Exact menu names differ by camera, so follow its manual when setting a custom balance.
- Choose the anchor: Decide whether the face, work surface or another area should appear neutral.
- Position the card: Put a neutral target at the subject under that chosen light, without glare or clipping.
- Set temperature: Start with the measured light or an appropriate tungsten/daylight preset.
- Set tint: Adjust green-to-magenta balance using the card and a reliable monitor or scopes.
- Record a reference: Film a short frame with the card, then remove it before the take.
- Lock and note settings: Keep the chosen values across matching angles, unless the lighting changes.
- Review actual faces: Check a short test clip, not just the card, before moving on.
On supported Blackmagic cinema cameras, the white-balance control sits in the on-screen interface alongside tint. The manufacturer shows that workflow on its Blackmagic OS overview. Other cameras may use a custom-white-balance button, a preset or direct Kelvin entry.
Manual, Preset and Auto White Balance Compared
| Mode | Useful when | Main drawback |
|---|---|---|
| Manual Kelvin and tint | Controlled setups and matching coverage | Requires a sound reference |
| Tungsten or daylight preset | Fast setup under a familiar source | May miss real source variation |
| Custom card-based balance | Neutral subject light is available | Only samples its local light |
| Continuous auto balance | Fast-changing documentary conditions | Can drift between shots or mid-take |
Auto white balance has a place, especially in unpredictable recording. For planned dialogue coverage, though, a stable manual setting often makes matching easier. Record why you chose the setting, not merely its number.
Why Film White Balance Struggles With Mixed Light
Mixed light means different sources illuminate the scene with different colours or spectral qualities. One global film white balance setting applies broadly to the picture, so it cannot make every independently lit surface neutral. A correct face can therefore coexist with an orange wall and blue doorway.
There is a second problem beyond Kelvin. Some LEDs and fluorescent lamps render colours differently even at similar stated colour temperatures. ARRI explains that human-facing colour-rendering scores do not directly predict a camera sensor’s response in its lighting and camera colour discussion.
That is why dialing two fixtures to the same numerical value does not promise identical skin colour. Spectrum, tint, the camera’s sensor and the surrounding surfaces can all matter. A controlled test tells you more than a label on a light. Film white balance cannot replace that test.
Three Choices for a Room With Conflicting Sources
- Keep the contrast: Balance for the main face and allow lamps or windows to retain their colour.
- Unify the light: Change fixtures, adjust compatible lamps, filter sources or block unwanted spill.
- Split the work: Capture clean reference frames, then make selective fixes in post where the footage supports them.
Choose the first route for intentional colour contrast. Choose the second when two faces must match under different lamps. Use the third for modest cleanup, not as a promise to rescue every lighting mistake.
A Clearly Fictional Mixed-Light Film Scene
Imagine a fictional short film set inside a tailor’s shop before sunrise. Meera checks a finished jacket under a warm desk lamp. Cool daylight enters through the open door, while an old ceiling tube leaves a slight green cast on the back wall. Meera, the shop and every production decision in this example are invented.
The imagined crew plans to keep her face natural, the desk lamp welcoming and the doorway cold. They start by testing a neutral card beside Meera’s face, where the chosen key light falls. The card should not sit by the door because that would measure a different colour of light.
Shot One: Meera Stays at the Workbench
The team chooses a fixed manual balance for the light on her face. As an illustration, a tungsten-style key could suggest a starting point near 3200 K. That is an assumed example value, not a measurement of this imaginary set.
Now the door can read blue and the practical lamp can stay warm. If the overhead tube puts green into her hair and cheek, however, tint alone may not isolate it. The crew can turn that tube off, replace it or flag its spill instead.
Shot Two: Meera Walks Toward the Door
Her face moves from warm workbench light into cool daylight. A single fixed balance keeps the colour shift visible, which might suit the story. If the director wants her face to remain constant, the crew must instead shape the light along her path.
They could add a consistent key, soften the doorway light or revise the blocking. They should also record another reference after a major change. No global white-balance value will make two different light pools behave as one.
Lighting Changes That Work Better Than a Menu Adjustment
The simplest on-set improvement may be switching off one troublesome lamp. When that is impossible, a flag can keep its spill away from skin. A compatible adjustable fixture may also help the key source match the chosen look.
Lighting gels can shift colour, but they may reduce output and do not guarantee full spectral matching. Check the result on the actual camera. Also watch reflective surfaces because a coloured wall can bounce unwanted colour back onto a face.
For exposure, use tools suited to brightness rather than treating white balance as a light meter. Aperture, shutter duration and ISO affect a different part of the picture. Movieshala’s film exposure triangle guide explains those controls and their limits.
Film White Balance and Colour Grading: Where Each Fits
Good film white balance gives post-production a clear starting point. Correction can then refine temperature, tint and shot continuity, while creative grading shapes mood. That order matters because correcting every warm lamp to white would erase a deliberate lighting decision.
Adobe’s Premiere colour-correction guide explains white-balance eyedropper and temperature/tint controls. They help adjust overall balance, but an eyedropper samples a particular area. In mixed light, choose a patch lit by the source you actually want to neutralise.
Selective masks and secondary corrections can reduce a local cast. However, clipped channels, weak colour information and uneven mixed spill can limit the result. RAW recording may offer more flexible interpretation of white balance, yet it cannot recreate colour detail the sensor never captured.
For the distinction between a technical correction and a creative look, see Movieshala’s film colour grading guide. A reference image should guide the colourist rather than dictate a perfectly neutral final frame.
Film White Balance Mistakes That Cause Continuity Problems
Changing Kelvin between every camera angle may make each shot seem pleasant alone. When those angles cut together, however, the faces can shift colour with every edit. Keep a reference still and check the scene as a sequence.
- Trusting a random white object: A cream wall or printed shirt may not be neutral.
- Clipping the white card: Lost channel detail makes a reference unreliable.
- Balancing in the wrong pool: The card and the actor must share the relevant illumination.
- Ignoring tint: Kelvin alone will not handle every green or magenta cast.
- Leaving auto balance active: A change in framing can trigger an unwanted shift.
- Neutralising story light: A warm practical may be intentional, not a defect.
- Trusting display appearance alone: An uncalibrated screen can hide or invent a colour problem.
These errors are easier to prevent than to repair. Small, repeatable tests also help different camera units or shooting days match without forcing every scene into one look.
A Quick On-Set Check Before Recording
Watch the face first, then the card, the background and the cut to the previous setup. This order keeps the story ahead of the numbers. A beautiful neutral chart means little if the actor crosses into an unexpected green spill.
- Confirm which surface or subject needs neutral colour.
- Check that the card receives the same main light as that subject.
- Record the chosen Kelvin, tint and a reference frame.
- Inspect skin tones, coloured practicals and the full movement.
- Recheck after changing lamps, positions or daylight conditions.
Perfect matching is not guaranteed, especially with moving daylight and unrelated fixtures. When a test fails, first remove the offending source or light the face consistently. Next, recheck tint and card position. Save local grading fixes for what remains.
The Final Frame: Choose the Light You Mean to Keep
Film white balance is not a command to make every surface white. It is a way to decide what the camera treats as neutral. Set a reference near the subject, use Kelvin and tint deliberately, and control conflicting lights where the story needs consistency.
When mixed colours serve the scene, preserve them rather than chasing a single perfect number. Film white balance works best when the colourist receives usable images and notes about which colours are choices.
Frequently Asked Questions
What is the best Kelvin setting for filmmaking?
There is no single best value because the main light can change between setups. Around 3200 K and 5600 K are familiar tungsten and daylight starting references, not universal instructions. Check the actual light and intended look before locking the camera.
Should filmmakers always use a grey card?
A reliable grey card is valuable when colour accuracy and shot matching matter. It provides a reference for the chosen light, especially after major lighting changes. It does not guarantee that every area of a mixed-light scene will match.
Can auto white balance work for a short film?
Yes, particularly when a scene changes too fast for planned manual adjustments. However, continuous auto balance may shift between angles or during a take. For controlled coverage, a locked reference often makes continuity more predictable.
Why does skin look green after white balancing?
A fixture may produce a green-biased cast that Kelvin does not fully address. The face may also receive a different light from the reference card. First check the card position and tint, then inspect the source itself.
Can you fix mixed lighting in colour grading?
Sometimes you can reduce local casts with selective corrections and masks. Yet a global adjustment cannot independently balance every source. Strong spill, clipping or poor colour information may leave visible limits, so lighting changes on set remain valuable.
Does shooting RAW mean white balance does not matter?
No. RAW workflows may allow more flexibility with white-balance interpretation in post, depending on the camera and format. Still, mixed sources and missing colour detail remain real problems. Record the intended balance and reference rather than relying on rescue work.
Is a white card better than an 18% grey card?
Neither is automatically better for every task. A neutral white card can help custom balance if it stays below clipping, while a calibrated grey reference also supports exposure assessment. The important requirements are neutrality, suitable light and correct placement.
Does white balance work the same way with colour film stock?
No. Photochemical colour film stocks have a daylight or tungsten balance, so crews use suitable stock, filters and lighting choices rather than a digital Kelvin menu. Lab timing and scanning can adjust colour later, but the original balance still shapes the image.
How do I keep white balance consistent across shots?
Use a shared reference light, lock settings across matching coverage and record a card after changes. Review adjacent shots together because a mismatch may be less obvious in isolation. If daylight shifts, retest rather than copying an outdated setting.